Friday, November 16, 2012

Kindergarten Claude Monet Bridge and Lily Pond

To starts this lesson we read "The Magical Garden of Claude Monet"


Overview

Julie is a happy little girl who lives in Paris, but she wishes she could walk in a country garden. Julie is pleased when her mother decides to take her to visit the most wonderful garden in the world, owned by a great friend of the family. They arrive at their destination, and for this little girl it is like walking in a dreamy world where twisting plants grow as tall as trees. When Julie's dog runs away, she asks the gardener to help find her pet, and soon she and the gardener are friends. But this amiable, bearded old man is a very unusual gardener, for not only does he cultivate his many plants, he also paints beautiful pictures of them. Julie has made a friend of the great impressionist painter, Claude Monet. Based on a true story about the daughter of another fine artist, Berthe Morisot, this charmingly illustrated picture book includes reproductions by author-illustrator Laurance Anholt of a famous waterlilies painting, which Monet completed in his garden at Giverny, a few miles from Paris.

As Claude Monet is recognized for his many paintings of lily pads check out this painting recently auctioned for 43 million dollars! We were inspired by this painting by Claude Monet in creating our work:

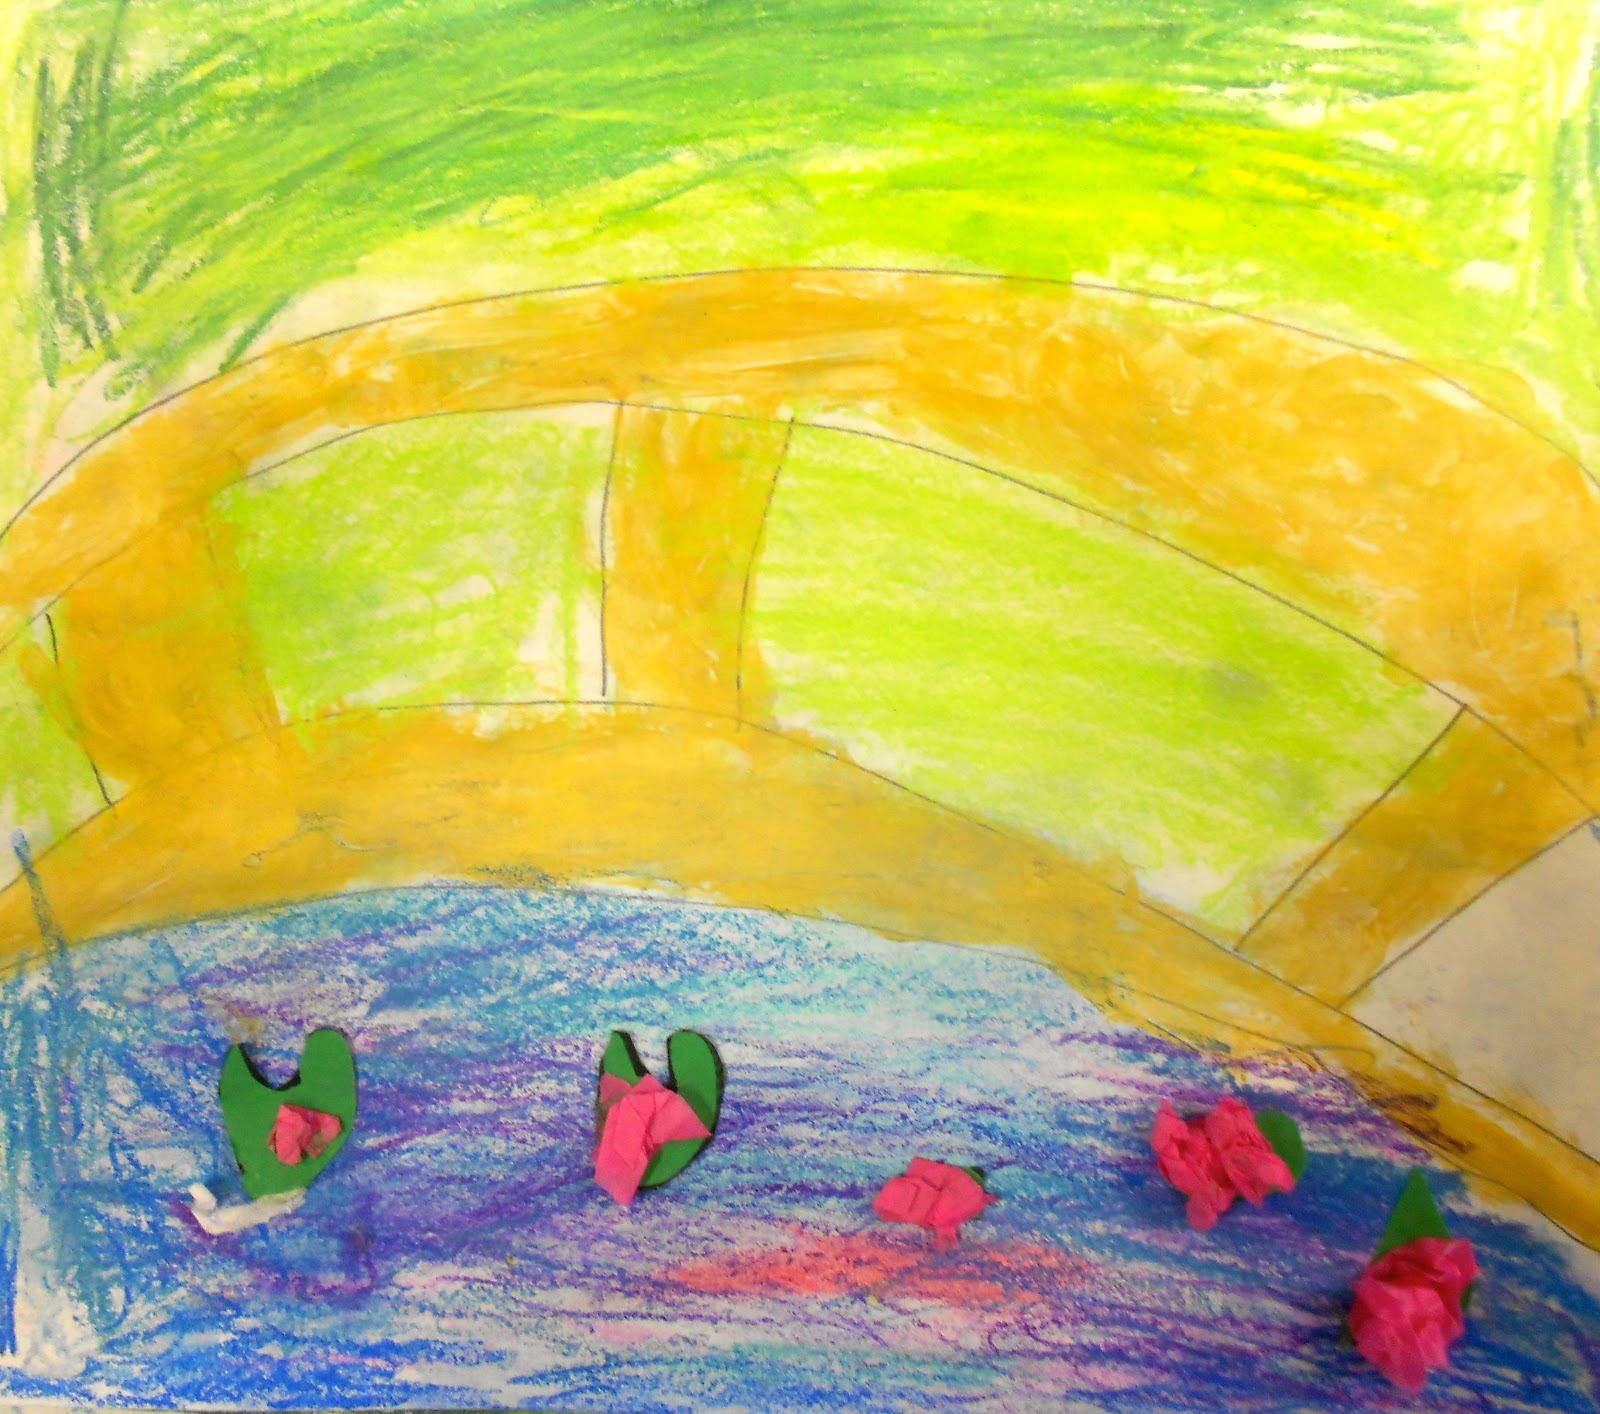
"The Japanese Footbridge"

We first did a step by step directed drawing of the bridge.  Students were then given gold paint to paint their bridge. Next using blue, purple, and pink chalks we practiced blending and created our water under the bridge.  Above the bridge we used greens and yellows to create our trees and shrubbery.  To add a final touch we made lily pads by using construction paper and tissue paper.

Teacher Example: 


Student Examples:


Thursday, November 15, 2012

1st Grade Pinch Pot Pumpkins

Welcome To Our Pumpkin Patch!

First graders made pinch pot pumpkins using model magic.  Students first made an upside down pinch pot for the bottom and added another piece of model magic for the stem.  We then painted the bottoms orange and the stems green.  


Tuesday, November 13, 2012

5th Grade Composition Gourds and Pumpkins

For this project 5th graders discussed composition.

Composition: is the placement or arrangement of visual elements in a work of art.

We discussed how generally when we start to draw we put the subject right in the center of the page.  Leaving nothing to the imagination.  For this project students were given pumpkins and gourds to draw from to create an interesting composition.  

We followed these guidelines:

1. The object cannot be in the center of the page, put it on the page in an interesting way.
2. The object should go off the page, the entire object should not be seen.

To color our pumpkins and gourds we used colored pencil focusing on value, looking at the darks and lights.  Students also practiced layering colored pencils to get a complete finished look.


Monday, November 5, 2012

Kindergarten Pinch Pot Lady Bugs

Kindergartners started this lesson by talking about shape vs form.


We then read "The Grouchy Ladybug" by Eric Carle.

Step by step using model magic students first made a pinch pot, they added a head and pulled up antennas, and poked in eyes with the back of a pencil.  They then divided the pinch pot with a line to make the wings and by rolling small balls and flattening them on the ladybugs body they made spots.

Students were then able to paint there ladybug choosing one color: yellow, red, or green.  They used black to paint the spots and head.


I apologize these little guys don't seem to photograph well and the pictures certainly do not do them justice!


Friday, November 2, 2012

3rd Grade Pop Art Pumpkins

3rd Graders studied pop art looking at images from Andy Warhol and Roy Lichtenstein as well as other pop artists.  Our main focus was on the contemporary pop artist Romero Britto.


Students discussed Pop Art and what that might mean.
Pop Art: Art based on modern popular culture and the mass media.  Pop Art is the movement in art when artists began to create art with subjects of things that are "popular" or iconic. 

We looked closely at Romero Britto's images.  Students identified what the popular image was and to take notice in how Britto divides his pieces up using black lines and placing different patterns in each section.  

We also discussed monochromatic colors.
Monochromatic Color: Containing or using only one color.


Students were instructed to make a Britto inspired pumpkin.  Using orange monochromatic colors students painted their pumpkins, they were allowed to use black for an accent color.  After the students were finished painted they outlined the black lines and patterns with black glue.

Student Examples:


Tuesday, October 30, 2012

2nd Grade Fall Apple Forms & Radial Symmetry Leaves

2nd graders have been working hard and well on this complicated project.  The first day of our project we talked about some of the things that the fall season brings.  We first focused on apple orchards.  I then went around and placed an apple on each of the tables.

We then talked about these terms:
Still Life: an object that does not move while you paint or draw it
Contour: the outside or outline of an object
Form: Making something look 3D on a 2D surface

Students were then instructed to make a contour drawing of the still life on their tables, in this case an apple.  After students made their drawing we talked about 3D vs 2D.  We talked about how the apples sitting on the tables are 3D, but the apples on our paper are 2D.  After a demonstration with oil pastels students were faced with the challenge of making their 2D apple look 3D.  After students finished their apple they were instructed to cut it out.

Teacher Example:


For the next step of our project we discussed radial symmetry. 
Radial Symmetry: Something that is the same on both sides and goes around a central point. 

Students were given a 6in x 6in square to make a leaf design.  They were instructed to keep it simple and the leaf stem must go to a corner.

Teacher Example:


After students designed their leaf they were instructed to flip their squares over and with pencil shade the back of their square.  Students then received a piece of tape and 12in x 12in piece of paper.  Students taped their square down to the paper and traced over the design with a ball point pen.  The design then transfers onto the paper, students continue this four times until all four corners are filled with their radial design.

Students then were able to go over their radial design with crayon adding some color.  We used wax resist with watercolor to make the finished radial symmetrical design.

This project took about 4 classes to complete, 2nd graders worked very hard and they are turning out wonderfully!

Teacher example:


To finish off the project students glued their cutout apple on the middle of their radial leaf design to create a fall inspired piece.

Teacher Example:

Student Examples: