Showing posts with label clay. Show all posts

Tuesday, April 14, 2015

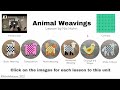
Steal Like An Artist--6th Grade Clay Looms

I'd consider myself to be what you call "trendy."  I really live life on the edge...I mean you might see me in socks and sandals one day and the next I'm wearing stripes on plaid.  Okay, so maybe our definitions of trendy are different, but I'm definitely not afraid to own a really bad style or trend, or to even try a new one!  But the art trend (which really isn't really a trend, but really popular in which students love) that I just haven't jumped right on board with is weaving.  It seems a little strange means I can make every design of a friendship bracelet and loved making a good God's Eye  in my youth (I used to even sell them at garage sales and lemonade stands).  I just wasn't confident and doing this with my students for some reason--WHICH WAS SO CRAZY OF ME, because I found it to actually be quite simple and fun.  After watching the weave-lovin' Cassie Stephens YouTube video like a trillion times I felt good to go.  Because of my low weaving self confidence, I totally stole this lesson from Beth over at It's Art Day!  Like straight up stole, so thanks Beth!


I used my favorite air-dry clay coloring technique--oil pastels with liquitex clear gloss over top.  This lesson was actually kind of amazing.  I had planned several days for students to do the weaving portion, as I knew it would take some time.  I kid you not, without me asking just about every single 6th grade student (except for like 5) almost begged to work on their project outside of class time. Yeah, that was real life. Amazing.  I was almost getting sick of the students coming down to my classroom to get more yarn!  It was simply awesome to see them so excited about it.  I know this was a rather simple lesson for 6th graders, but prior to my arrival (3 years ago) they only had art once every 16 days, so we still have a little catching up to do in some areas.


Don't forget to steal like an artist:


post signature

Friday, March 6, 2015

Clay Mania

To preface this, you might need to know a little bit more about me.  See I'm the type of person who doesn't take the time to match my socks, I mean I don't mind if they're different colors as long as they're on my feet what's the big deal?  I'm guilty of wearing socks and sandals, not just a casual 'I got done at the gym so I'm going to slip my sandals on.'  In fact, I LOVE wearing socks and sandals, there's no shame here, besides how else would you see my mismatched socks?  I'm also the type of person that loves the cold.  Don't get me wrong, I live for summer, but there's something so refreshing about cold crisp air, ya know the kind that makes your nose hairs freeze?  I'm always surprised when I'm out on a run in sub zero temperatures and I don't see anybody else...like HELLO where are you?! 

So now you think I'm crazy, besides the fact that I am on day 12 of 21 of not having coffee (guys, caffeine withdrawal is real, I repeat caffeine withdrawal is real)...well I guess I am crazy, but aren't all the best art teachers?

Well my craziness transferred over into the art room because I decided it would be a grand idea to have 1st, 2nd, 3rd, and 6th grade all do clay projects at the same time!  I mean it does make set up a whole lot easier and we all know how messy that clay is so for the sake of cleanliness I just wanted to make one big mess at once and be done with it..ya dig?  When I'm at my other two buildings on my cart it also makes it so much easier to have all the classes doing clay at the same time otherwise I simply don't have space!  

I live in a no kiln world, so air dry is my method.  My room is filled with clay projects, It was almost like magic--I kept finding more and more places to put clay!  So now I've got all these projects sitting in brown paper sacks for the classroom teachers to send home at conferences next week, so it actually worked out quite nicely.

Because I do work with air dry clay and am only with each group once every eight school days clay has to be one day lessons.  No way can we save it for the next class.

2nd grade made these precious little flower plaques.  Texture was key in this lesson and students did such a nice job slipping and scoring that not a single one broke! Seriously?! That's a first.


I gave them the base, that I had rolled out.  But for a couple classes I forgot my rolling pin at my other building so this is me being resourceful.  But honestly it was awesome.


1st grade embarked on these little clay hearts and stars.  (I guess I didn't get any images of the stars, most students went for the heart)


I gave them a piece of paper like this and students filled in the shape with "snails" and circles, smoothed it all out, flipped over the clay piece and revealed all of the patterns.  Before students added oil pastels on top I dipped them in a watered down black acrylic bath.


Can you tell this student loves Ireland?

3rd grade made these coil pots with red Amaco air dry clay.  I'm trying to be more of a "yes [wo]man" so I let students use whatever color oil pastels they choice, but I'm thinking the method I tried last year worked a little better.


Well now I'm going to go into my classroom and drown in my piles of clay.  If you don't hear from me for a while you'll know where to find me.


Monday, January 12, 2015

PEEEEE YEWWW--Do you smell that?

Kindergartners had their first taste (not literally, yuck!) of clay.  Kids always love clay especially when you trick them into thinking it's this super awesome magical stuff.  For kindergarteners I like to start out some sort of project using a pinch pot, just to keep it simple.  The past few years we made ladybugs, and yeah they were cute, but I was sick of those.  I was perusing the interwebs and ran across this project over at ARTventurous and adapted it to my needs. 

Especially with my kindergarteners, I like to start a project with some sort of literature.  This seemed like a no brainer, I'm going to read a story about a skunk.  I set upon the task of searching the school library using the keyword "skunk" and only one book came up, Move Over Rover.  Well this book is actually about a dog and the skunk has a short guest appearance of about 10 seconds, it was the best I could do.  Someone needs to write more books about skunks ASAP, kids love the grossness and smelliness of a skunk...think of all the art project possibilities. 


We started out with a simple pinch pot body, pinched up a couple ears, and pinched out a little nose.  Lastly we took a back of a pencil to poke a little hole in the back for the tail.  In one class I had the students attempt to use the pipe cleaners to make the tails.  Even with my superb step by step instructions only 2 students successfully made a tail, so I made the executive decision to just make the rest for the other classes.

The next class students placed a piece of masking tape down the back of the skunk and simply painted it black.  Since the air dry clay dries white I peeled the tape off to reveal a white stripe.  To finish it all off I hot glued on the tails and the eyes. 


I love these little guys.  I think they are super cute and funny.  One of the kindergarten teachers used her classes as a Christmas gift for the parents.  For the girls, they added a little bow to the head, and the boys added a little bow tie under the nose.  She then took a picture of each of her students holding a sign that read "Merry Christmas from your little stinker."  Pretty clever, right?  I wish I had some pictures of them, but what a great idea!


Sunday, May 11, 2014

Happy Mother's Day!

Here are some fabulous clay projects 4th graders worked on very hard to give as Mother's Day gifts.  The inspiration for this lesson came from here and here.  Because students knew they'd be giving them as a gift, they took so much pride in making them, which is always fun to see.  These were actually so simple to make.  We spent one day working with the wet clay and the next to paint.


We used acrylic paint and I added in a pearl medium mix in color that left a nice finish.  Students could choose to paint the heart whatever color they liked, but most chose to do the metallic gold or silver.  Using stamps I had from when I was in a big homemade card making phase of my life (about the 5th grade…those things are vintage) students pressed in images, quotes, and sayings of their  choice.  Most of them used something like "For A Special Mother."

I took them outside sprayed them with a little glitter spray and a clear gloss enamel….


and ta-da we had some pretty beautiful things.

Here are some detailed images.  Naturally, they don't photograph as AWESOME as they actually are.


Happy Mother's Day to all those Mom's out there!  If you haven't seen this video it's a must see, might even make you a little teary eyed.

Thanks Mom's!

Shout out to my mom:


Thanks for making the 90's awesome.  


Monday, May 5, 2014

4th Grade Clay Cupcakes (with Sprinkles!!!!!)

I've had a few different clay projects going on in 4th grade.  At one of my schools we decided to make clay cupcakes.  I've made these before with the silicon cupcake holders using model magic, salt dough, but this round we used air dry clay.  It's the perfect clay project to do as the year winds down as it is SIMPLE and the kids love it.  We had just finished another project where we studied Wayne Thiebaud so it was also a good extension of that. At the particular school where I did this lesson I have two sections of 4th grade.  One class did such a nice job of following directions and helping each other out (whereas the other did not) they were rewarded with "sprinkles."  Through trial and error I found a method that works! I was originally going to coat with epoxy, but I didn't have the time and want to spend the extra cash on that.    

I first coated with the E6000 Spray Adhesive, sprinkled the sprinkles on top, then sprayed the adhesive again.  I let that dry for maybe 20 minutes and went over with the clear coat.  To my surprise no colors ran and they stick! I used a combination of the long soft sprinkles and the tiny circles.  They both stick fine, but because of the softness of the longer sprinkles some of them will get smashed when picked up.  So if you're going to try (or if I do it again sometime) I would suggest the smaller sprinkles.